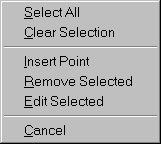
Place the cursor over the Elevation Dialog and press the Right Mouse button. The following menu displays with a list of available commands. Each command is listed and explained below.

|
Select All |
This command selects all the points of the current line in the Elevation Dialog. This allows for mass editing of the entire line.
|
|
Clear Selection
|
Clears any selected points from being highlighted.
|
|
Insert Point |
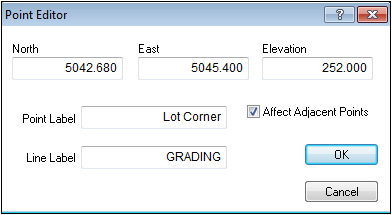
Allows a point to be added to the selected line. By default, the line is added as an Entered point using the elevation of the selected point. The new point is added above the selected point, or toward the head of the line on the list. When Insert Point is selected, the Point Editor window displays. |

Change the North, East and Elevation as needed and assign any labels. Checking the Affect Adjacent Point pox causes any other lines which share that point to be modified as well. Press OK to apply these changes and close the window.
|
Remove Selected |
Remove selected deletes the currently selected point(s) and then rejoins the line based upon the line label.
|
|
Edit Selected |
Displays the Point Editor window. |

Change the North, East and Elevation as needed and assign any labels. Checking the Affect Adjacent Point pox causes any other lines which share that point to be modified as well. Press OK to apply these changes and close the window.
A shortcut to edit a single point is to selected the point and either double-click the Left button over the point on the 2D Planview or over the point on the Elevation Dialog.
|
Cancel
|
Cancel closes the Right Mouse Menu and deselects any selected lines on the 2D Planview. |