Align Matching Edges
This command has several uses. It can be used for edge matching data
from separate grading sheet, rotate data into the correct field coordinates
or move data on different surfaces into the same coordinate system. The
essential part of this command is having two common points which to use
to move the data. Property corners or pad corners are often good points.
Video Links: Aligning
PDF files with a Matchline, Aligning
PDF Files to an Overall Plan Sheet, Aligning
PDF Files to CAD Data, Aligning
PDF Takeoff to a CAD File

Edge Matching Data |
When
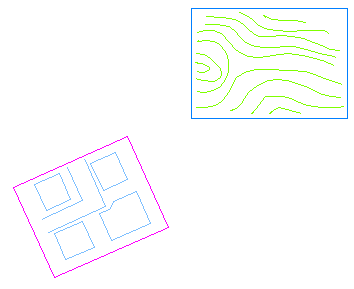
files are merged, often they are in different coordinates systems
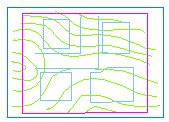
and/or not aligned north. Selected data can be moved and edge
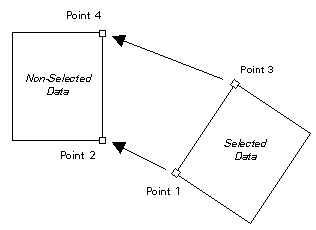
matched to non-selected data. Data is edge matched by having two
common points in both sets of data. Point 1 is moved to match
Point 2, and Point 3 is moved to match Point 4. See the example
below.

Select all data to be moved. Also see: Selecting Data Pick the FIRST point (Point 1) indicating
WHAT data you want to align. The Alignment: Point 1 or 4 window
displays the coordinates of the first point. Press OK to continue. Pick the SECOND point (Point 2) indicating
WHERE the FIRST point matches. The Alignment: Point 2 of 4
window displays. Press OK to continue. Pick the THIRD point (Point 3) indicating
WHAT data you want to align. The Alignment: Point 3 of 4 window
displays. Press OK to continue. Pick the FOURTH point (Point 4) indicating
WHERE the THIRD point matches. The Alignment: Point 4 of 4
window displays. Press OK to continue. A warning window may appear stating that the
second pair of points may not match each other. This is common
especially with the degree of human error of digitized takeoffs.
Alignment does not rescale the data. Press OK to continue. |

Rotating the Data |
Data
is rotated by having the point in the correct coordinate system
and their matching points in the current coordinate system.
Pick the FIRST point indicating WHAT data
you want to align. The Alignment: Point 1 or 4 window displays
the coordinates of the first point. Press OK to continue. Pick the SECOND point indicating WHERE the
FIRST point matches. The Alignment: Point 2 of 4 window displays.
Press OK to continue. Pick the THIRD point indicating WHAT data
you want to align. The Alignment: Point 3 of 4 window displays.
Press OK to continue. Pick the FOURTH point indicating WHERE the
THIRD point matches. The Alignment: Point 4 of 4 window displays.
Press OK to continue. A warning window may appear stating that the
second pair of points may not match each other. This is common
especially with the degree of human error of digitized takeoffs.
Alignment does not rescale the data. Press OK to continue. |

Moving Data |
Data
is moved to match the coordinate system of data on another surface,
like moving the design to match the existing ground. This is similar
to edge matching, but the data is being aligned to data points
on a different surface or layer. This is commonly used to move
data imported from a CAD file to align with data from a takeoff.
Press the Esc key on the keyboard to de-select
all data. Press Alt-B
to display the Layer Selection window. Turn on all required layers. If moving design
to match existing, make sure they are both on.

Select all the data in the layer you wish
to move. Also see: Selecting
Data Choose Align
Matching Edges from the Transform Job Submenu and choose
"Selected Lines" from the window that displays. Pick the FIRST point indicating WHAT data
you want to align. The Alignment: Point 1 or 4 window displays
the coordinates of the first point. Press OK to continue. Pick the SECOND point indicating WHERE the
FIRST point matches. The Alignment: Point 2 of 4 window displays.
Press OK to continue. Pick the THIRD point indicating WHAT data
you want to align. The Alignment: Point 3 of 4 window displays.
Press OK to continue. Pick the FOURTH point indicating WHERE the
THIRD point matches. The Alignment: Point 4 of 4 window displays.
Press OK to continue. A warning window may appear stating that the
second pair of points may not match each other. This is common
especially with the degree of human error of digitized takeoffs.
Alignment does not rescale the data. Press OK to continue.

|
![]()
![]()
![]()