Survey data from the field is applied using the Apply Survey command. However, there must be a Current surface and data in the Data Lines layer before the survey data can be applied and staged. There are two primary methods of applying the survey data. The first is when the .esw file comes from the field with survey data which has not yet been applied. The second method imports the .agt file containing the survey data.
In the example below, a stock pile on the existing surface was surveyed. Data Lines from the Existing surface must be copied and pasted in the new Current surface Data Lines layer.
|
|
|
![]()
When a .esw file comes from the field containing survey data, but no Current Surface, the Apply Survey command in not available. To make this command available, a Current Surface must be created and data entered into the Data Lines layer. Below are the steps required for applying the survey data.
Open the job's .esw file.
Switch to Entry Mode.
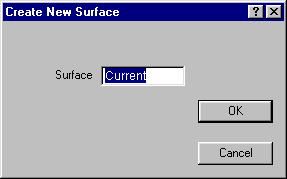
Select New Surface from the Edit Menu. The following window displays.

Accept the default name Current, and press the OK button.
Switch to the Surface to Existing and the Layer to Data Lines.
![]()
Switch to Edit Mode.
Choose Select All from the Edit Menu. All the Existing surface Data Lines highlight.
Select Copy from the Edit Menu.
Switch back to Entry Mode.
Change the Surface to Current and the Layer to Data Lines.
![]()
Select Paste from the Edit Menu.
There is now a Current surface with information in both the Data Lines and Survey layers. The Survey data from the field automatically places itself in the Current surface when it was created.
Choose Apply Survey from the Edit Menu. The screen goes blank with only the survey data visible. Move the crosshair in close to the survey data and enter a boundary around it. Press the Right-Mouse button to display the menu and choose Finish to close are boundary. The screen begins to rotate showing the applied survey data and a window with the following options.
Below is an example of the Apply Survey Data window.
|
|
|
![]()
Survey data created in the field can be imported. The .agt file is imported into the active .esw file. The .agt and the .esw file must both be in job coordinates. A Current Surface must be created and data entered into the Data Lines layer before the survey data is imported. Below are the steps to importing the survey data.
Open the job's .esw file.
Switch to Entry Mode.
Select New Surface from the Edit Menu. The following window displays.

Accept the default name Current, and press the OK button.
Switch to the Surface to Existing and the Layer to Data Lines.
![]()
Switch to Edit Mode.
Choose Select All from the Edit Menu. All the Existing surface Data Lines highlight.
Select Copy from the Edit Menu.
Switch back to Entry Mode.
Change the Surface to Current and the Layer to Data Lines.
![]()
Select Paste from the Edit Menu. There is now a Current surface with information in the Data Lines layer. The Survey data from the field must now be imported into the Current surface.
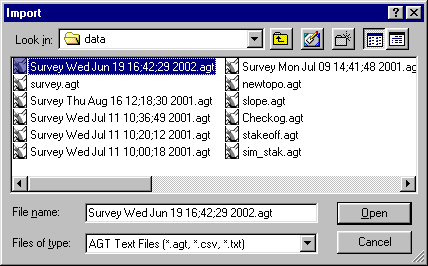
Select Import from the File Menu. The Import window displays.

Change the directory path and select the file from the list in the window. The name then displays in the File Name text box. Press the Open button to get the file. AGT files import using CAD Transfer Mode. The screen switches to CAD Transfer mode allowing you to transfer the data.
Change the Surface to Current and the Layer to Survey Data.

Select the data and transfer it to the Current surface Survey Data layer using the Send To button.
Switch to Entry Mode.
Choose Apply Survey from the Edit Menu. The screen goes blank with only the survey data visible. Move the crosshair in close to the survey data and enter a boundary around it. Press the Right-Mouse button to display the menu and choose Finish to close are boundary. The screen begins to rotate showing the applied survey data and a window with the following options.
Below is an example of the Apply Survey Data window.
|
|
|