Entering Sectional Areas
Sectional Areas are closed areas that modify the Design Surface by their specified depth. Below are the steps for entering a sectional area.
Select Entry Mode with the toolbar icon or by selecting it from the Window menu.
Pick the Layer control from the toolbar and change it to Sectional Areas.
![]()
The program prompts for the depth at the bottom of the screen. Enter a value for the sectional depth.
Begin entering the sectional area using snap to attach it to existing data lines for more accurate results.
When you reach the starting point (marked with a diamond) press the Right Mouse button once to end and close the area.
Sectional Areas with other sections are not additive.
|
Holes |
A sectional area with a depth of 0 acts like a "hole".
|
|
Nested Sectional Areas |
The depths of a sectional area is taken from design surface. Nested sectional area depths do not combine. For example, a sectional area of depth 0.5 entered within a sectional area of depth 1.0 will remain a depth of 0.5 from the design surface. |
Editing Sectional Areas
To edit a sectional area, switch to Edit Mode, change the Surface to Design and the Layer to Sectional Area. Left-click on the area to select it. Do one of the following to open the edit window:
Press the ![]() Edit Report Region button. (The option opens the Report Region window)
Edit Report Region button. (The option opens the Report Region window)
Choose Report Region from the Edit menu
OR
Double-click on the area. The Edit window displays.
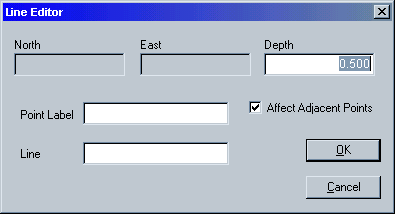
Change the Depth as desired and press OK to apply the changes. If the depth of the section needs to be raised above grade, enter it as a negative (-) number. An improperly located sectional area must be deleted and re-entered.