Selecting Objects
Once there are many objects on the Print Page, it can often become difficult to select the desired object to edit. Objects can be picked by placing the arrow over it an pressing the Left Mouse button. If you select any object on the page, the Tab key on the keyboard can be used to toggle between the different objects on the page until you select the one you want. A picked object displays 4 blocks around the object. In cases of multiple overlapping objects, holding down the Shift key while pressing the Left Mouse button cycles between objects.
![]()
Moving and Sizing Objects
To relocate an item on the Print Page, select the item with the Left button. The item displays a black square at each corner when it is selected. Once an object is selected it can be moved by placing the arrow over it, pressing and holding down the Left Mouse button, and then dragging to the desired location. Sizing is done by placing the arrow over the lower right block of the object and dragging the box to the desired size.
![]()
Adding Text and Graphics
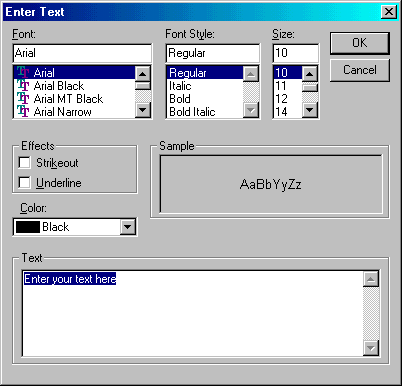
Text can be added by pressing T or selecting Add Text from the Edit menu.

The Text dialog allows specification of the Font, Style, Size, and Color. Type in the desired text, set the specifications and press OK. The created object can be moved and sized like the other objects. Editing text on the Print Page is done by first selecting the text with the Left button and choosing the Add Text command.
![]()
The Print Preview window also supports importation of several graphics types. Graphics are imported by selecting Import from the File menu. When selected, the Import window displays.

The window displays a selection of Windows Metafiles, Enhanced Metafiles, BMP (bitmaps), and PCX files available for importing to the Print Preview Page. Select the image file from the list and press the Open button. Once imported, the image can be moved and resized following the direction list above.
![]()
Deleting Objects
Selected objects can be deleted by pressing the Delete key or by selecting Delete from the Edit menu.
![]()
Scaling
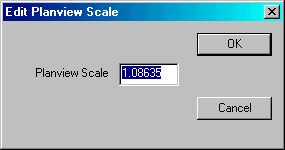
The 2D Planview can be scaled by first selecting the planview with the Left button. Select the Drawing Scale command from the Edit Menu.

Type in the new scale and press the OK button to apply the new scale and close the window.
![]()
Changing Cut-Fill Labels
The Cut-Fill Labels on the shaded, planview map can be altered by using the Cut-Fill Font Size and Cut-Fill Label Style commands located under the Edit Menu on the Print Page.